
Image out of camera. (Cropped)

Final Edit.
This Image is available for limited print purchase. Head over to the prints page to see.
Let's Jump Right In
Color grading can be done in many many different ways. As much as I wish Photoshop had the color grading ability of video software. It doesn't. It's a much more "Blind" task. You have to have some idea of color theory and understanding of color and lighting to color grade photos.
Disclaimer that many new editors think: Color grading is not a filter. It is not a one step process. It is not a preset. It is not a LUT. Color grading does not CHANGE the light or fix bad lighting of a photo. It only helps tell your story via color, and focus the spectators attention.
Color grading takes knowledge, skill, time, and patience.
The "easy" way to color grade photos... Gradient Maps
There is a lot of debate on the use of gradient maps and how well they work, when to use them, that you should never use them etc. Don't @ me. I am just showing you a relatively fast way to color grade. This is really only one step in many that you can use to achieve the colors you want in a photo.
Before we start, it is vital to understand that starting with a RAW image, tiff, or a JPG that has a lot of leniency as those which come from Fuji cameras is a must!
The Effect of Just Adding a Gradient Map

Edit before gradient map.

Image after gradient map is applied.
Out of Camera

Image out of camera.
Creating a Gradient Map
There are many approaches to this. I use Adobe Color Theme plugin. (This is only a reference tool.)
Using this tool I select the color of focus. I typically use skin tone / color of the subject of the photo, in this case, the duck. Select the color via eyedropper and add it to Adobe Color Theme. After it is selected you select your style of color grade. I like complementary colors.

Select Focus Color. The color you want the audience to see first.
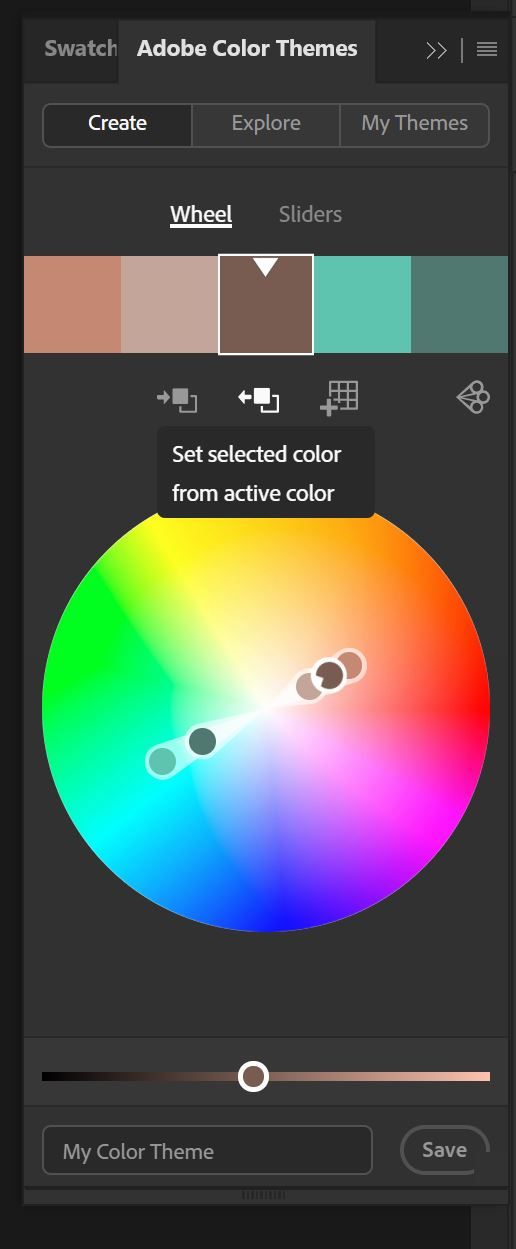
This button moves that to the middle color. (Make sure the middle section is selected)

Select your color style.

Add the colors to swatches. This is where you can use them to help you.
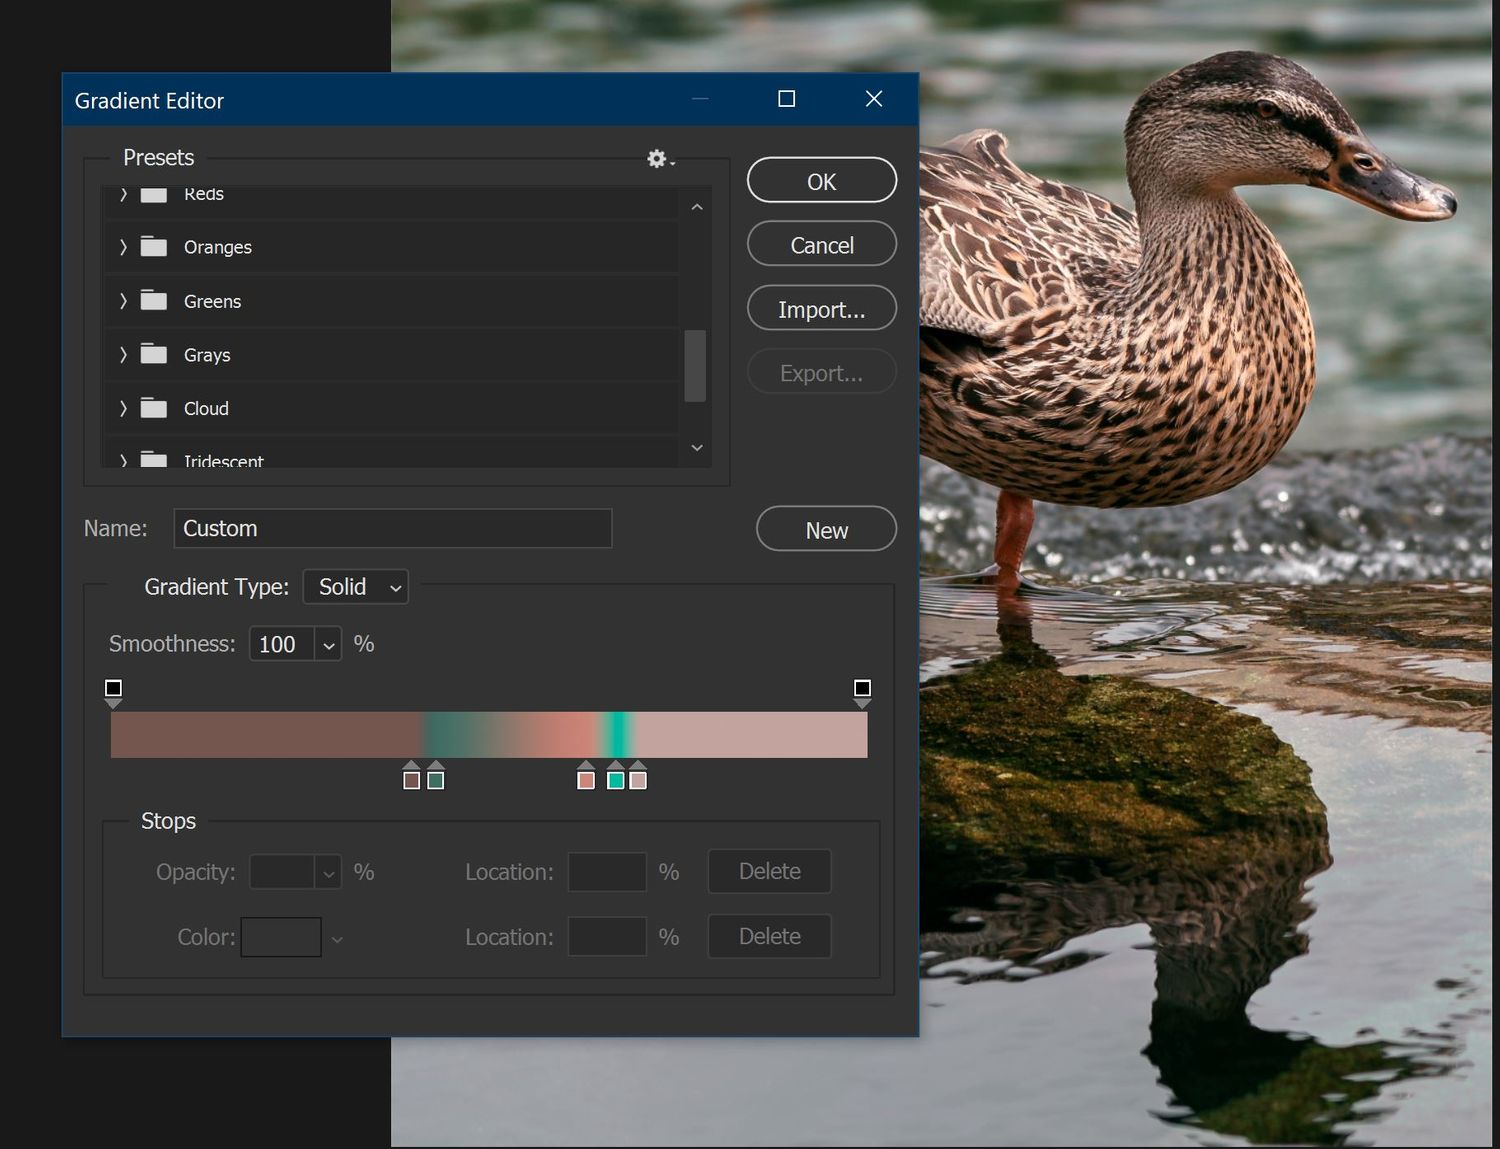
Create a New Gradient Map Layer
Add each color one by one to the swathes on the bottom of the map. (Make new swatches by clicking empty space under the map.
The "L: (Luminosity Value)" will be your "Location" value for EACH COLOR. This is vital for this process to work. This step maps the color to the relative colors in the photo.
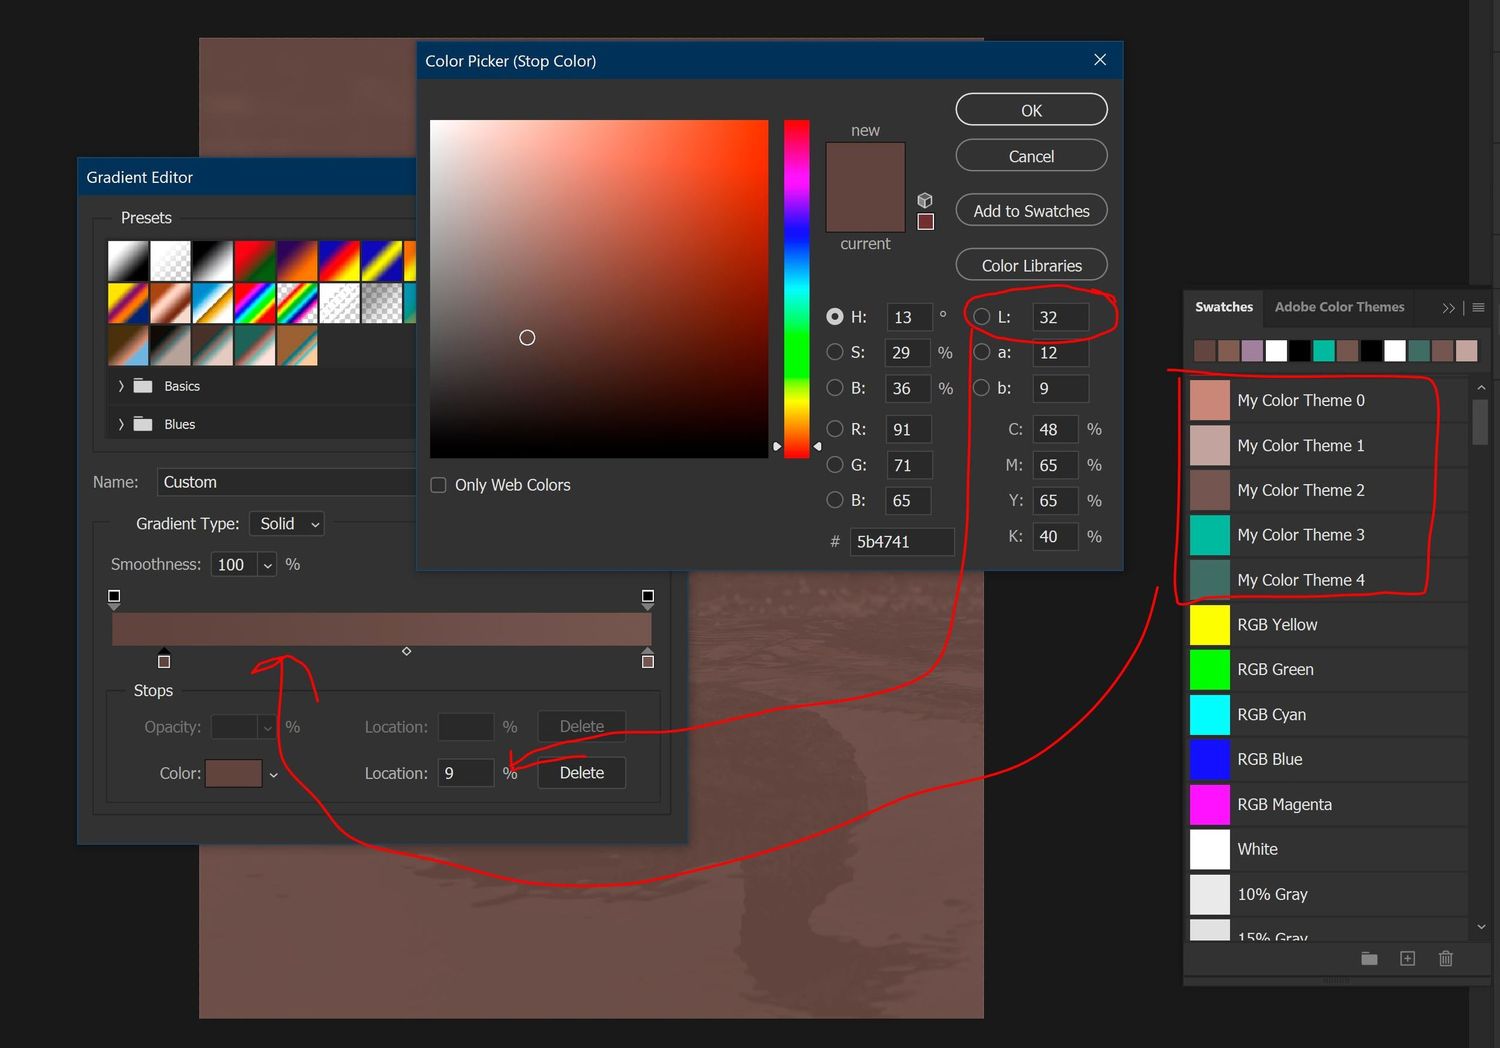
Creating the map with the colors you selected.
Finished Color Gradient Map
Finished Gradient Map should look like this. Greatly varies dending on the colors you use. You're look for 5 colors matching the theme you selected.
Apply the Gradient Map
I typically use soft light, hard light, or pin light as a blending mode for gradient maps. This can vary depending on the effect you want. This gives it a subtle look. I usually restrict the map to 6-20% opacity. This depends on the dynamics of you photo, the format, and the colors involved.

See Above for Gradient Map Result.
This is obviously not all I did to achieve such dramatic results from out of camera to final edit. It is only a good jumping off point to add contrast, and help color grade an image.
The FULL Edit
Aside from the adjustments from photoshop RAW that make a big impact, here is the Photoshop edit.
** I do not typically label my layers when editing, as I know my flow and how the layers are effecting each other. I highly recommend labeling each layer as you begin editing. Most of the layers are set to a subtle opacity or very minor tweaks in color, lighting, contrast, and sharpening.

Image pulled from Camera Raw adjustments.

Image with all the layers applied.
Interested in Photo Editing?
I am available for one-on-one video call editing sessions where I can help you though your editing, at your pace. Likewise, if you have photos you need edited but don't want to spend the time, you can send them over to be edited.
Editing workshops: 1 hour Photoshop and/or camera raw editing one-on-one. Settings, color grading, retouching, frequency separation, etc.
Website Consults: 1-2 hour evaluation of your website, content, and SEO with you. Create detailed plan for improvement on site performance.
Photo Editing: Need photos retouched, color graded, or edited in any way? Send me request with a link to the photos for a quote. Photos must be high resolution or RAWs.
**Subject to availability and photographer's discretion for scope of project.
